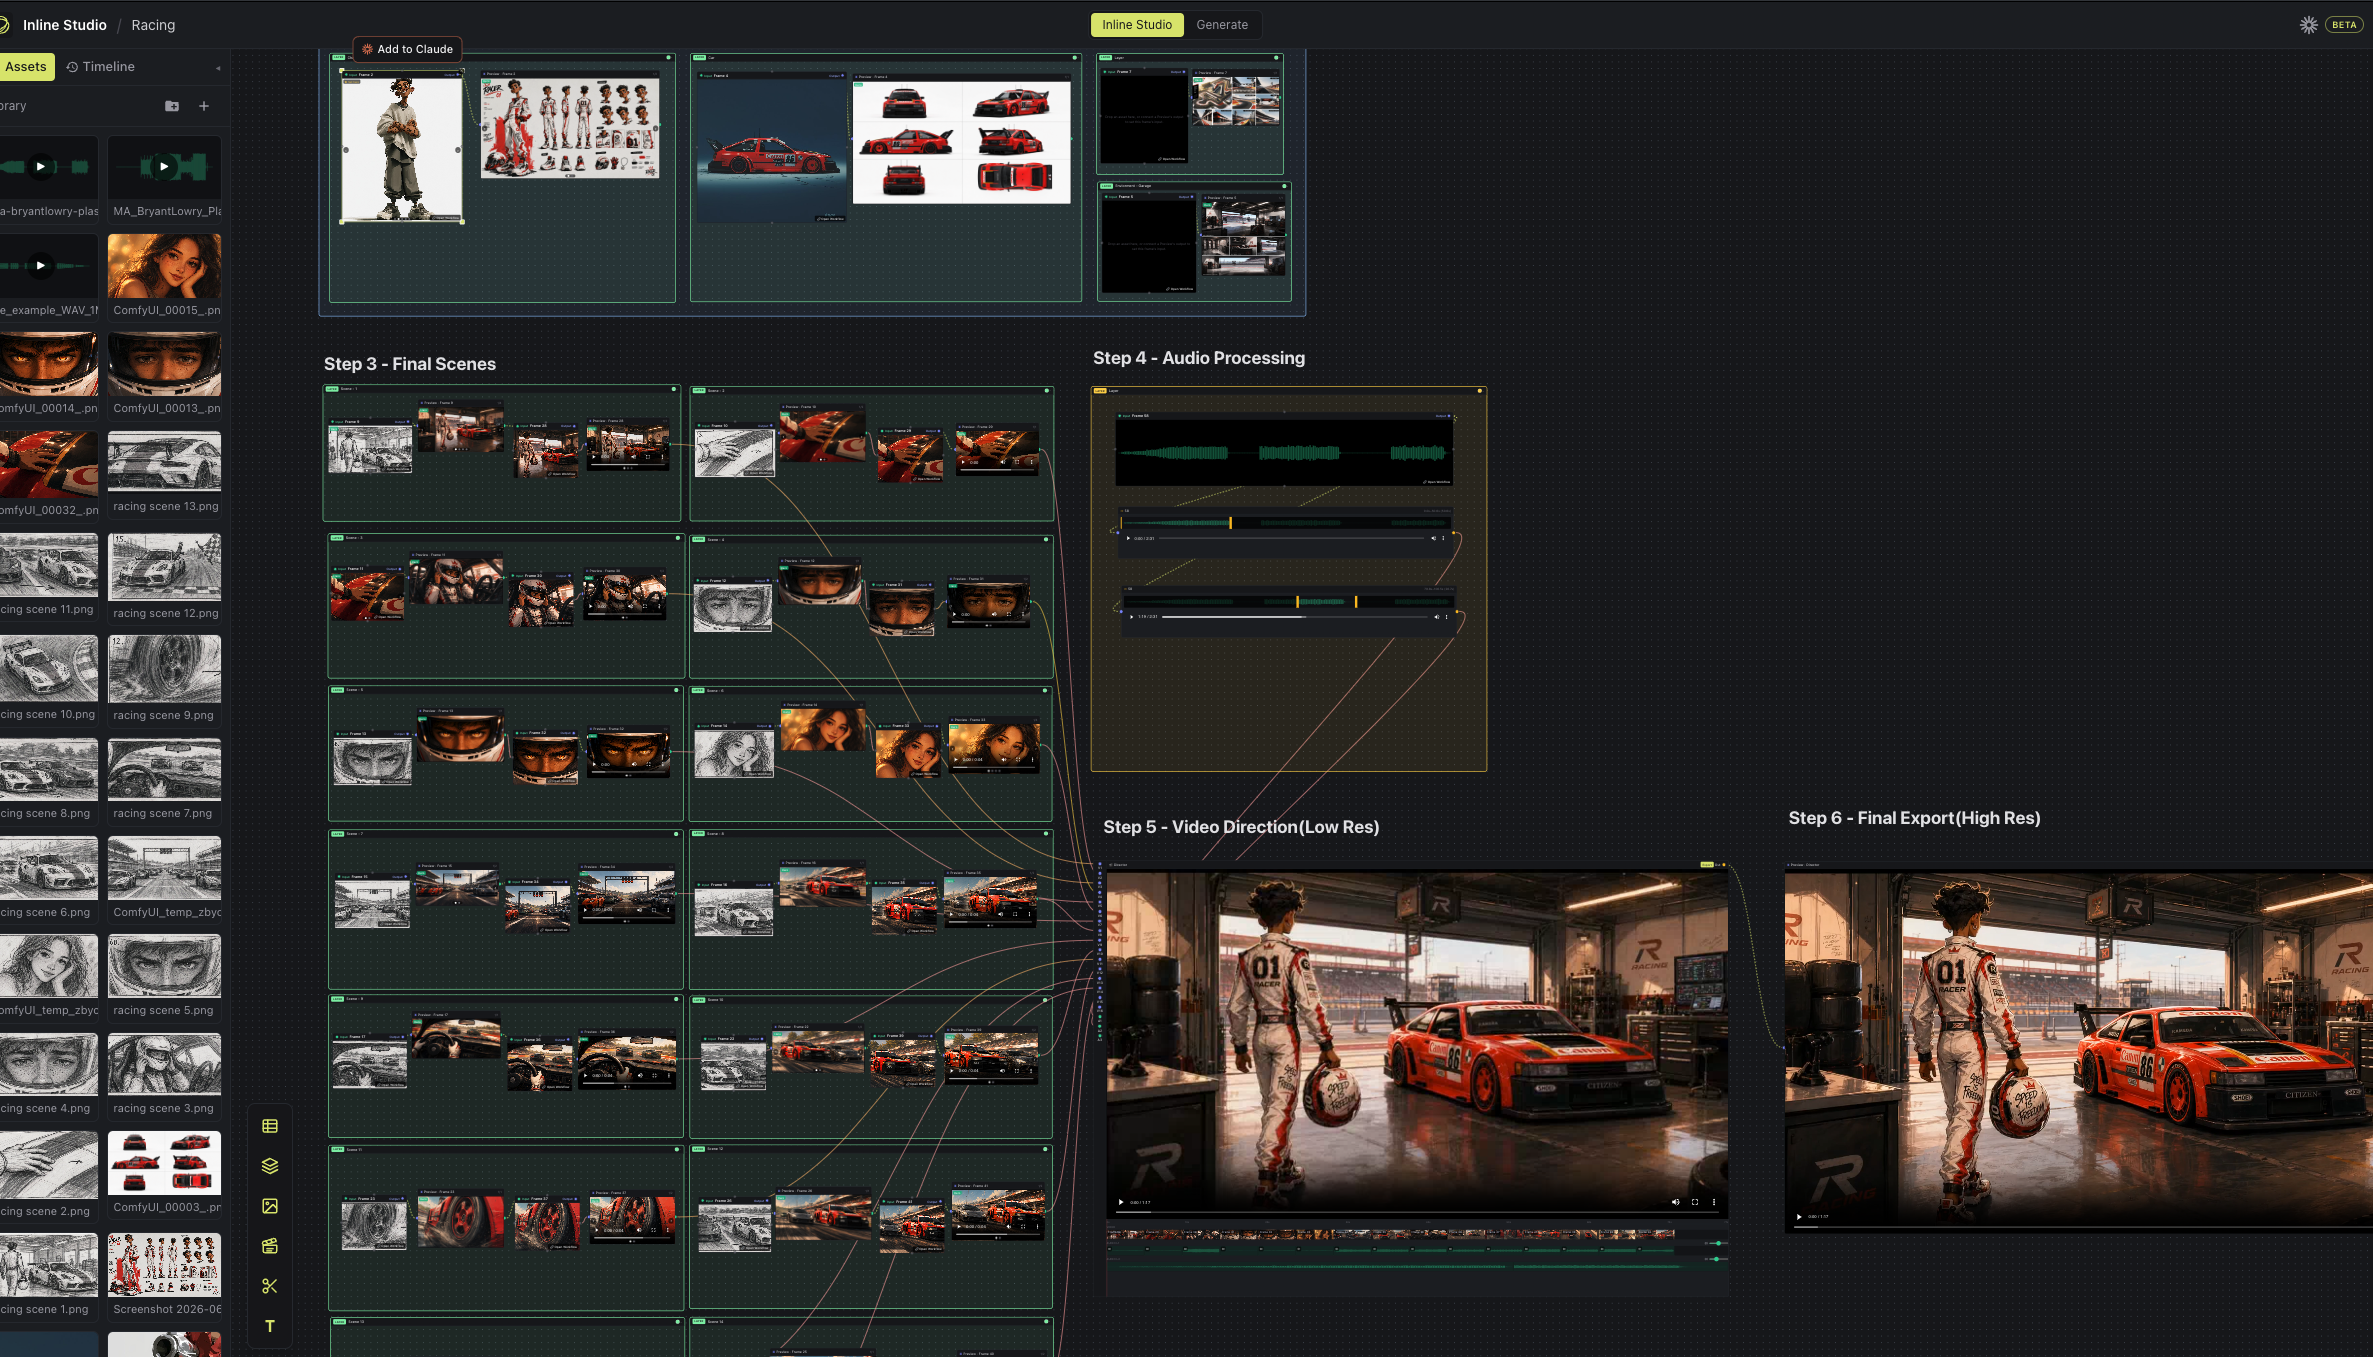
A free and open-source app for AI filmmaking on a single node canvas. Train your own LoRAs and generate locally on your own GPU, with hosted models when you want them. Every render is kept as a versioned take.




New here? Start with the getting started guide →
| Model | Train | Generate | 16GB card |
|---|---|---|---|
| FLUX.2 (klein Base 4B) | yes | yes | ~8.6GB |
| Krea 2 (RAW, 4-bit) | yes | yes | ~11.9GB |
| Z-Image Turbo | yes | yes | ~13.4GB |
| MiniMax H3 (video) | yes | yes | ~20.6GB, slowly |
| Hosted models (API Nodes) | no | yes | no GPU needed |
VRAM is the training peak at 512px. Training is cheaper than generating, and a LoRA trained at 512 applies at any generation resolution. Full per-card matrix and timings: Benchmark results.
You need Python 3.11+. The web UI ships as a Python package, so there is no
Node step. --install --extra all installs everything: the engine, the model runtime, the trainer
and the UI.
macOS / Linux:
git clone https://github.com/inlineresearch/Inline-Studio.git
cd Inline-Studio/core
./webui.sh --install --extra all
./webui.sh                         # http://127.0.0.1:8848
Windows (use webui.bat; webui.sh is a bash script and will not run in PowerShell):
git clone https://github.com/inlineresearch/Inline-Studio.git
cd Inline-Studio\core
.\webui.bat --install --extra all
.\webui.bat

rem If the CUDA build is wrong for your card, name the index yourself:
.\webui.bat --install --extra all --torch-index cu130
On NVIDIA, --install reads your GPU's compute capability and pulls the matching CUDA build of
PyTorch, RTX 50-series included. Everything lands in core/.venv, which Inline Studio owns; an
environment already activated in your shell is never touched. Re-running --install is safe.
Prefer pip? pip install -r requirements.txt from the repo root installs the whole app from PyPI,
then run inline-studio.
Hardware support, RTX 50-series, AMD ROCm, Apple Silicon
Honest status, what has actually been run versus what has a code path nobody has verified:
| Hardware | Status | Extra steps |
|---|---|---|
| NVIDIA, Linux | Tested, Z-Image Turbo 1024² on a T4 (16GB); Krea 2 1024² and LoRA training on an L40S (48GB) | None |
| NVIDIA, Windows | Supported | PyPI's default torch is CPU-only on Windows, so --install picks the CUDA build for your card |
| Apple Silicon (MPS) | Code path exists, untested | None. int8 does not apply on MPS, so a model too big for unified memory will not fit |
| AMD (ROCm), Linux | Untested, reports welcome | Needs a ROCm build of PyTorch, see below |
| CPU only | Works, very slow | ./webui.sh --cpu |
RTX 50-series cards are compute capability sm_120, and no wheel built for CUDA 12.4 or 12.6 has
kernels for them. --install reads the capability off the driver and picks cu130, so a plain
.\webui.bat --install --extra all is all you need.
Old driver? CUDA 13 needs driver R580 or newer. If yours predates it, --install picks cu128
and says so: cu128 still has sm_120 but is frozen at torch 2.11 and will never update, so update
the driver when you can.
--torch-index takes a short name (cu130, cu128, cu126), a full index URL, or cpu. Naming it
explicitly also replaces an already-installed torch, which a plain re-run will not do, so you
rarely need --recreate. INLINE_TORCH_INDEX does the same thing.
Not sure what you have? .\webui.bat --print-torch-index prints what the driver reported and which
index would be used, and installs nothing. That one line is what to paste into a bug report.
Nobody has verified this yet, so treat it as a starting point. Install normally first, then replace PyTorch, so nothing can overwrite your ROCm build afterwards:
cd core
./webui.sh --install --extra runtime

# Pick the index matching YOUR ROCm version: https://pytorch.org/get-started/locally/
uv pip install --python .venv/bin/python --force-reinstall \
  --index-url https://download.pytorch.org/whl/rocm6.2 torch

# hip should print a version, not None
.venv/bin/python -c "import torch; print(torch.cuda.is_available(), torch.version.hip)"
Do not run uv sync or pass --recreate afterwards; both put the PyPI torch back over your ROCm
build. The dtype heuristics key off NVIDIA compute capability, which is meaningless on RDNA and
CDNA, so open an issue either way.
Krea 2 is 26GB on disk and generation peaks near 36GB at 1024, so a 40GB card is the practical floor for inference. Training is far cheaper, see the table above. Z-Image Turbo is the low-VRAM path for generation: it is distilled to run CFG-free, so 1024² fits in about 11.5GB.
Command-line options
webui.sh (macOS/Linux) and webui.bat (Windows) map friendly flags onto the engine's INLINE_*
environment variables. core/main.py takes the same flags. Run --help for the full list.
| Flag | Env var | What it does |
|---|---|---|
--listen |
INLINE_HOST=0.0.0.0 |
Bind all interfaces so other machines can reach it |
--port N |
INLINE_PORT |
Port to serve on (default 8848) |
--models-dir PATH |
INLINE_MODELS_DIR |
Where weights are scanned from (default ./models) |
--data-dir PATH |
INLINE_DATA_DIR |
Where runs and takes are written |
--lowvram |
INLINE_PROFILE=lowvram |
Tight-VRAM profile (tiling, slicing, int8) |
--cpu |
INLINE_PROFILE=cpu |
Force CPU generation |
--vram-budget GB |
INLINE_VRAM_BUDGET_GB |
Treat the GPU as having GB of usable VRAM |
--multi-gpu [SPEC] |
INLINE_PARALLEL |
Split one image's denoise across GPUs; auto with 2+ GPUs |
--torch-index WHICH |
INLINE_TORCH_INDEX |
With --install, override the PyTorch wheel index |
--print-torch-index |
n/a | Print the GPU probe and chosen index, then exit |
--extra NAME |
n/a | Add an install extra: runtime, server, training, all |
--recreate |
n/a | Rebuild .venv from scratch |
--dev / --rebuild |
n/a | Live-reload dev loop / force a fresh SPA build |
From source (UI development): build the SPA with npm ci && npm run build:spa, then serve it
with cd core && uv run python main.py --front-end-root ../dist-web. Or ./webui.sh --dev for
Vite HMR on :5173.
Train on your own images, or on short video clips, on your own GPU with no cloud step. The
Trainer tab is a second canvas: wire the nodes, press Start, watch it run. The finished
.safetensors lands in models/loras/, where the LoRA loader node picks it up, so you can generate
with it in the Studio tab straight away.
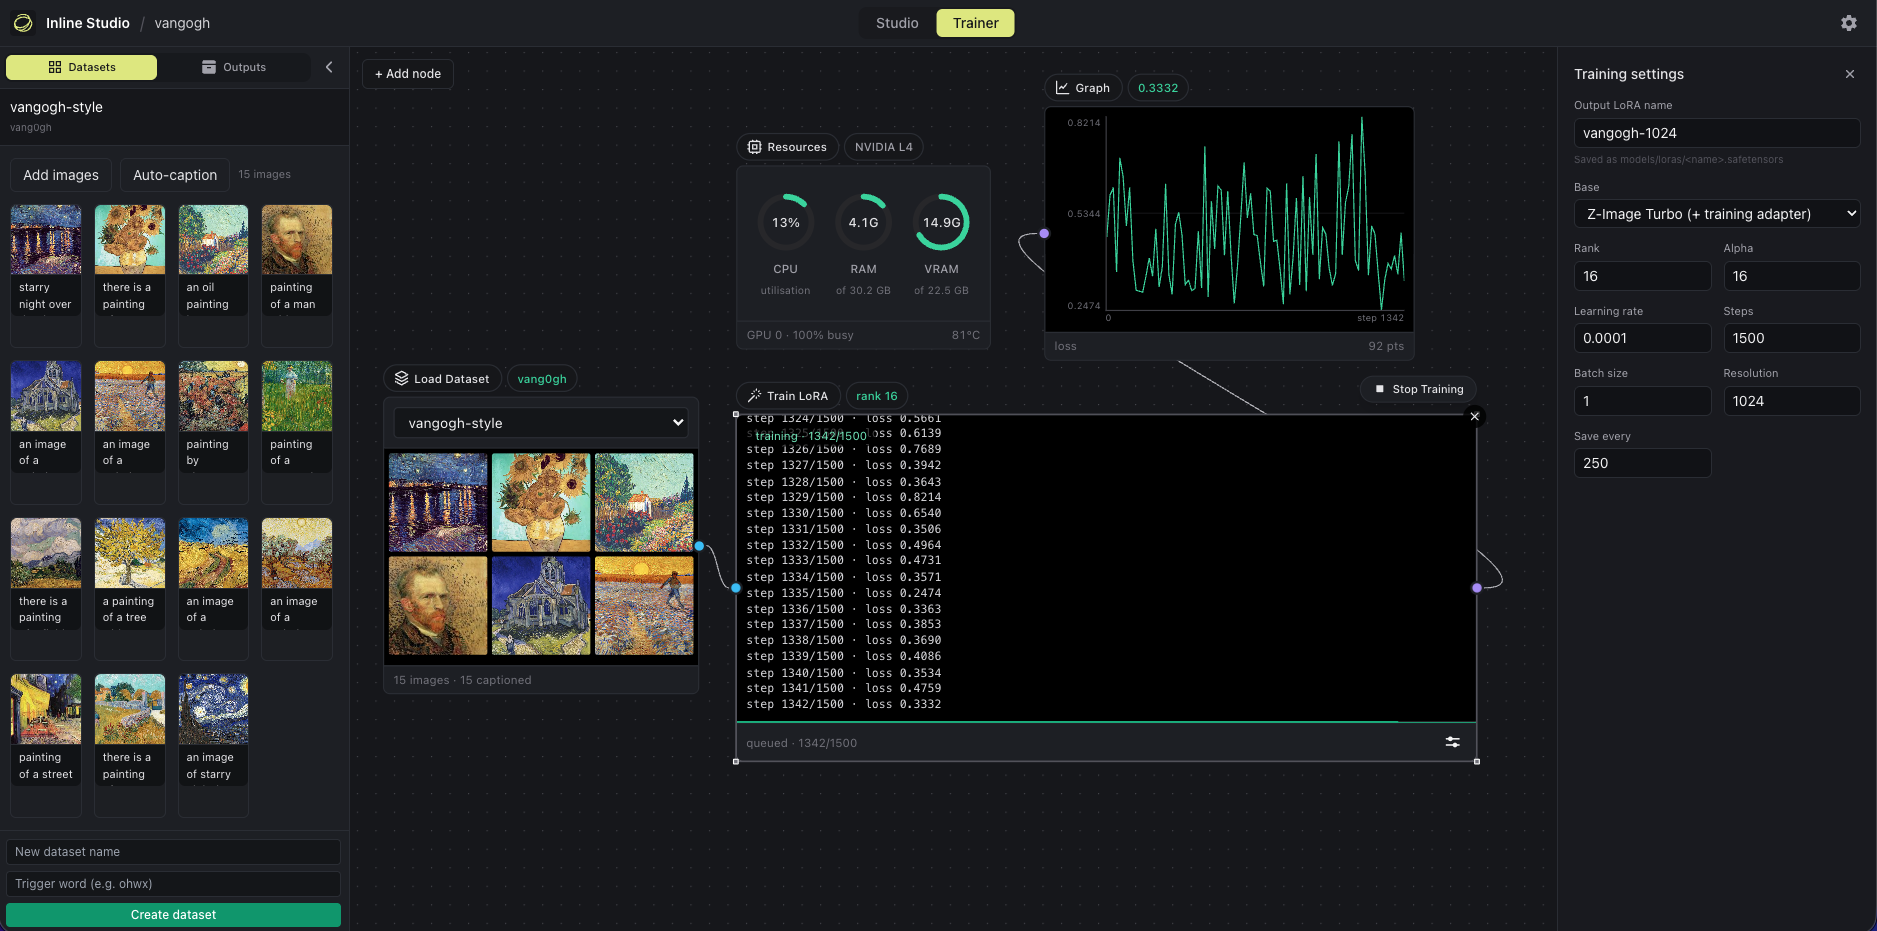
[ Load Dataset ] --> [ Caption ] --> [ Train LoRA ] --> [ Graph ]
                                          |
                                          +--> Resources (VRAM monitor)
Hyperparameters sit behind an Adjust button, so the node face stays a status surface. MiniMax H3 trains on stills for look and style, or on clips to learn motion as well; one dataset can hold both.
Already installed with --extra all? The trainer is ready. Otherwise
./webui.sh --install --extra training.
TRAINING.md is the full reference: which base to train on · benchmarks · training on clips · datasets and outputs · stop and resume · trigger words
A worked example: skin-lora-krea-2-raw,
trained here on Krea 2 RAW from the 26 pairs published as
krea2-skin-lora.
Drop a model node, wire a prompt, hit Run. One node, no loader or sampler wiring. Either put a
.safetensors in core/models/diffusion_models/, or use the node's model popup to download the
diffusion model, VAE and text encoder with visible progress. Nothing is fetched behind your back.
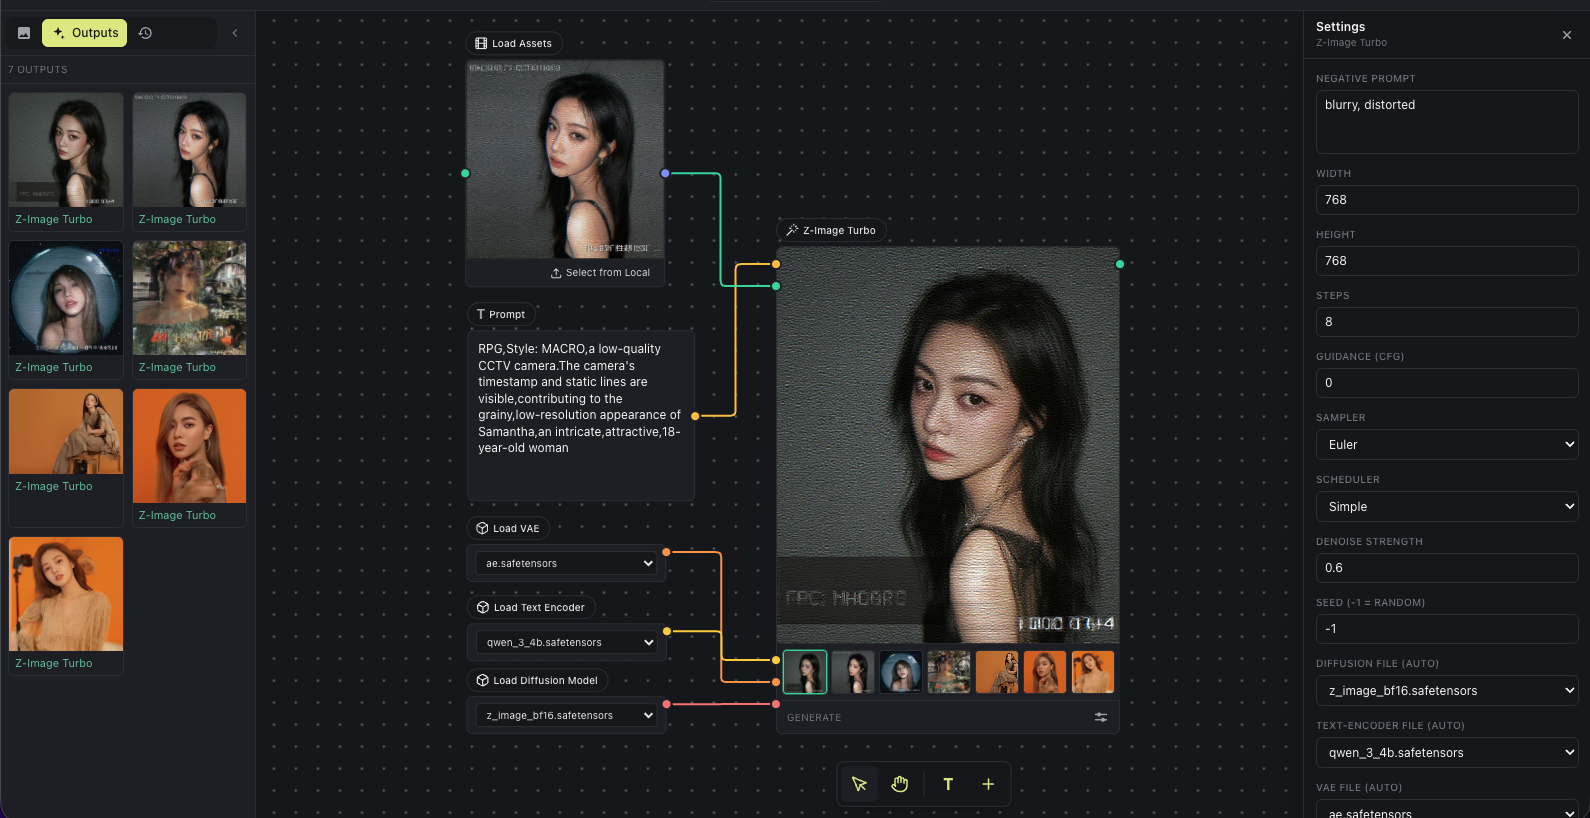
- Z-Image Turbo is the low-VRAM starting point, distilled to run CFG-free.
- Krea 2 is a 12.9B MMDiT in two halves: train on RAW, generate with Turbo. A LoRA trained on RAW applies to Turbo unchanged.
- FLUX.2 is natively multi-reference: wire several images and the prompt addresses them by position. One node covers klein 4B and 9B, their Base builds, and dev.
- MiniMax H3 generates video and its soundtrack in one pass, as four nodes (text, image, first and last frame, reference). 24fps, 5 to 15 seconds. See the open weights guide.
- ControlNet steers a local render with a pose, depth or edge map. Control Space is a 3D pose editor in a node, so you can build the skeleton rather than find a reference photo.
Model files: what goes where
Only the bf16 builds load. The fp8_scaled, int8_convrot, mxfp8, nvfp4 and pruned files
in the community repos carry ComfyUI-specific scale tensors that only ComfyUI reads; the node says so
rather than failing deep in a load. Memory saving is the device policy's job instead.
core/models/
  diffusion_models/  krea2_turbo_bf16.safetensors        <- Krea 2 Turbo (generate)
                     krea2_raw_bf16.safetensors          <- Krea 2 RAW (train)
                     flux-2-klein-4b.safetensors         <- FLUX.2 default, Apache 2.0
                     flux-2-klein-base-4b.safetensors    <- FLUX.2 base build, for training
                     minimax_h3_fl2va_bf16.safetensors   <- H3 text, image, first/last frame
                     minimax_h3_ref2va_bf16.safetensors  <- H3 reference node
  text_encoders/     qwen3vl_4b_bf16.safetensors         <- Krea 2
                     qwen_3_4b.safetensors               <- FLUX.2 klein 4B, shared with Z-Image
                     MiniMax-H3-text-encoder/            <- Qwen3-VL-32B, a folder
                     MiniMax-H3-processor/
  vae/               qwen_image_vae_diffusers.safetensors
                     flux2-vae.safetensors
                     minimax_h3_video_vae_fp16.safetensors
                     minimax_h3_audio_vae_fp32.safetensors
  loras/             your trained adapters land here
  controlnet/        ControlNet and control-LoRA files
Krea 2's VAE is the diffusers-format one from Qwen/Qwen-Image;
ComfyUI's qwen_image_vae.safetensors holds the same weights in a layout diffusers cannot read.
Every repo involved is public, so no Hugging Face token is needed.
MiniMax H3 is big: 144GB for the first three nodes, 210GB with the reference node. Measured on a 45GB card, a 10 second clip at 960x544 takes about 7.2 minutes, peaking at 38.9GB VRAM and 46.7GB of system RAM, so plan on 64GB of RAM. Canvas size is the biggest speed lever: 960x544 renders about 2.3x faster per step than 1344x768.
FLUX.2 dev on a 24GB card: take the ungated
diffusers/FLUX.2-dev-bnb-4bit folder rather
than the fp8 single file. A diffusers folder is a valid checkpoint anywhere a single file is.
Hosted models (API Nodes)
Add a Generate node and pick a model: hosted, closed models across image, video and audio, with no GPU and no setup. Bring your own provider key; it stays on your machine and you pay the provider per render, with each node estimating the price first.
The initial provider is fal: FLUX.2, FLUX.2 Edit, GPT Image 2, Nano Banana, Seedance, MiniMax H3, LTX, Sonilo and more. Add your key in Settings. MiniMax H3 is on the canvas both ways, as an API node and as local nodes with no per-render cost.
Local and hosted mix freely in one film, and either way the frame keeps its full take history.
Multi-GPU: split one image across GPUs
With two or more GPUs, Inline Core can cut a single image's latency by running its denoise loop collectively across them. This is not one image per GPU; it is one image whose sampling is shared, so a single render finishes faster.
Built on xDiT in an isolated worker group, one process per
GPU. The split method follows the interconnect Core detects: PipeFusion over PCIe, Ulysses with
NVLink. Turn it on with ./webui.sh --multi-gpu after uv pip install -e ".[parallel]".
- Free-form node canvas with versioned, non-destructive takes
- Train your own styles and consistent characters, locally
- Local generation built in, with the Inline Core engine
- Multi-reference composition, and video with sound
- Every locally generated image embeds the graph that made it: drop the file back on the canvas to rebuild the pipeline
- Video Director, Trim Video and Trim Audio nodes
- Export and import the whole project as one archive
- Community extensions, and API Nodes for hosted models
Follow the Animated Short Film tutorial →
Generating one frame is the easy part. The work that makes a film is what comes after: exploring options, keeping what is good, and shaping a repeatable process out of it.
A frame is a slot with a history of takes, never a single file. Generating again adds a take and nothing is overwritten. Export zips a project into one archive, inputs, outputs and the graph that turned one into the other, so whoever opens it can re-run the pipeline exactly.
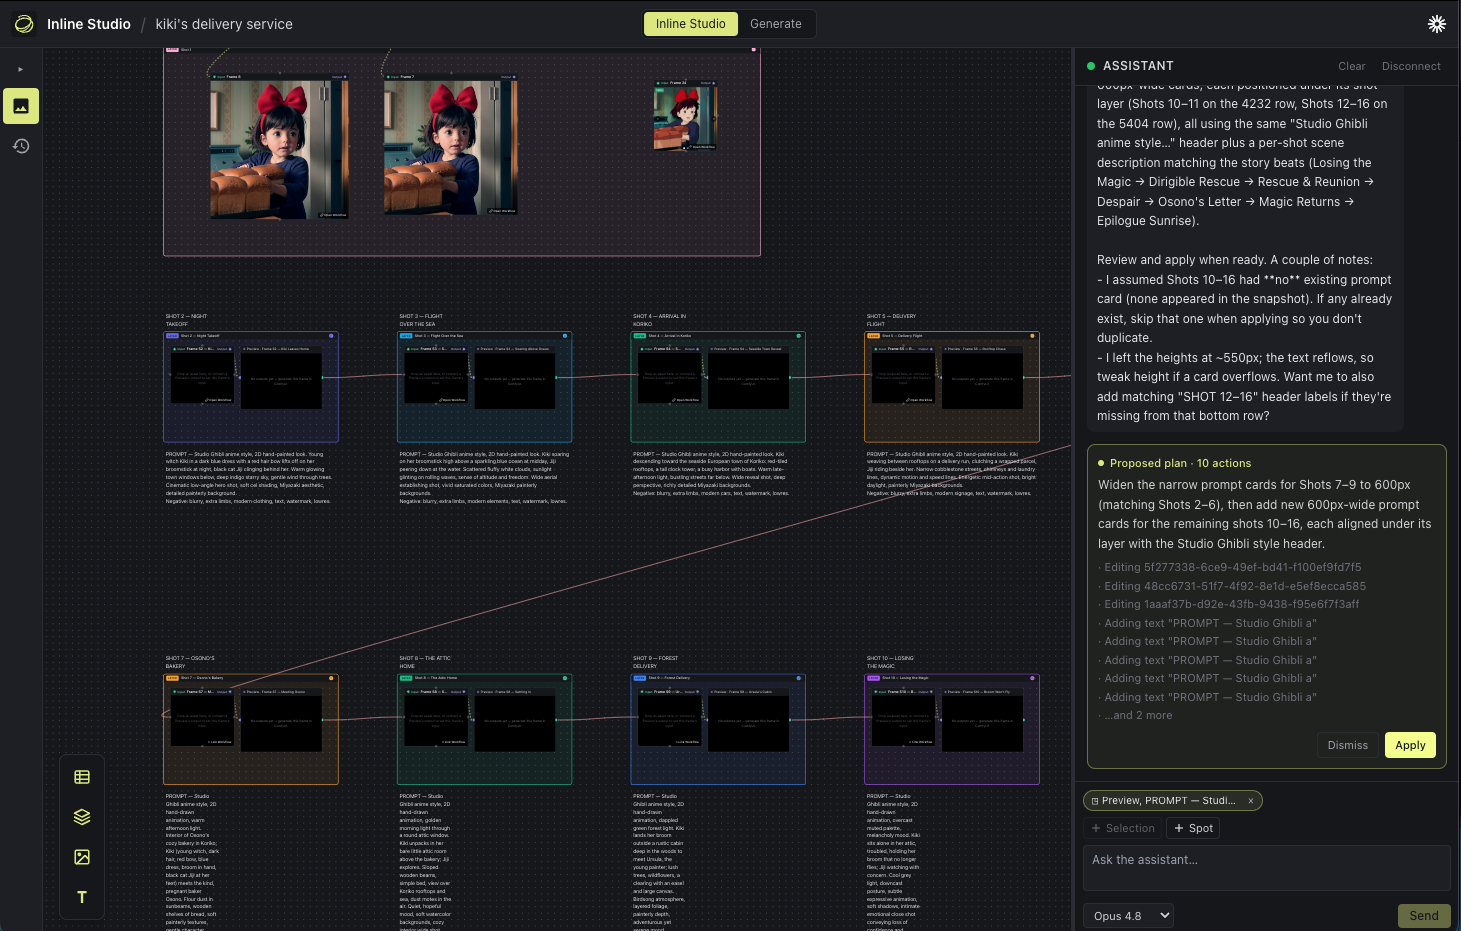
It runs as a single process on one port: the Inline Core engine (Python) serves the web UI and does the generation. No desktop install, no separate backend. For the engineering story see core/README.md and core/CLAUDE.md.
Install community-built nodes from a GitHub repo, from the Extensions dialog or a repo URL. Every install is security-reviewed, dependencies are isolated from the shared torch runtime, and nodes appear on the canvas immediately with no restart.
Browse the registry, or copy the extension guide to build your own.
Is Inline Studio free? Yes, free and open source under GPL-3.0. Local generation and training cost nothing to run. Hosted models are billed by the provider.
Do I need a GPU? Not for the canvas, planning, editing or hosted models. Local generation and LoRA training need one; see the table at the top.
Can I train a LoRA locally? Yes, for all four local models, on your own GPU. See TRAINING.md.
What models can I run? Locally: Z-Image Turbo, FLUX.2, Krea 2 and MiniMax H3. Hosted: the fal catalogue, with more providers to follow.
Issues, ideas and pull requests are all welcome. Start with CONTRIBUTING.md for setup and the checks to run; CLAUDE.md is the deeper engineering guide. By taking part you agree to our Code of Conduct.
- xDiT for the PipeFusion and Ulysses parallelism behind the multi-GPU denoise.
- ai-toolkit by ostris, for the approach to training on a step-distilled model, and the Z-Image and Krea 2 training adapters.
- diffusers for the Krea 2 and MiniMax H3 reference implementations.
- Krea AI for Krea 2, under the Krea AI Community License.
- Black Forest Labs for FLUX.2: klein 4B, its Base build and the VAE are Apache 2.0; dev and the 9B builds are non-commercial.
- MiniMax for MiniMax H3, under the MiniMax H3 Community License.
GPL-3.0. Model weights are yours to obtain and carry their own licences, which the GPL does not change.